Photo editing tips using Mac Preview

Full disclosure: I am a Mac user. I like Macs more than PCs for a number of reasons, and Apple’s suite of products (though sometimes head-scratching) are my preference.
Mac Preview is the default photo and PDF viewing program built into every Apple computer. It allows users to bypass using Adobe Acrobat (or, Photo Viewer on Windows computers).
Originally designed to simply view documents, Mac Preview offers a variety options for making minor edits. If you use a Mac computer and don’t think of yourself as particularly “graphic design-savvy,” check out these easy-to-use editing features of Mac Preview:
This blog post will demonstrate how you can take advantage of each of these features of Mac Preview using cute cat photos … because the Internet really exists for us to all look at cats, right?
Note: Before making edits to photos, it is good practice to save a copy of the original photo so you can always come back to it if needed. Learn more about version control.
Resizing
One of the most common tasks for basic photo editing is resizing. Either you need a photo to fit within a smaller space, or perhaps you need the file size to be smaller for web. These adjustments are made easily within Mac Preview, and you can even do them as a batch if you have multiple photos.
After opening my three adorable cat photos, I can see my preview window has all three photos in the left sidebar, and I can view one image at a time in the main viewing area.
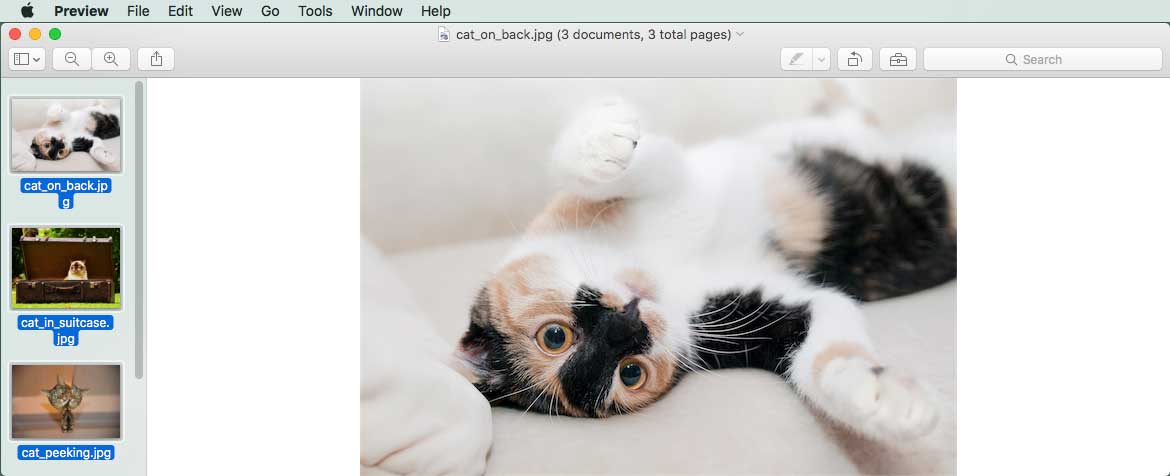
After opening my three adorable cat photos, I can see my preview window has all three photos in the left sidebar, and I can view one image at a time in the main viewing area.
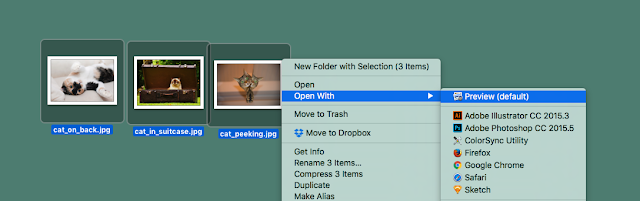
To resize all of these opened photos at the same time using Mac Preview, select all three in the left sidebar. Do this by clicking the top photo, scroll to the bottom photo and hold SHIFT+click.

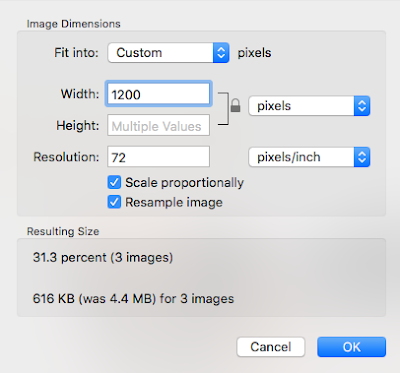
Next, in the top navigation, click Tools > Adjust Size. By typing in a new width, you can resize the images to a desired width. Additionally, you can change the resolution to something more web-friendly. Typically, high-resolution photos are 300 pixels per inch, while photos on the web are set to 72 pixels per inch. Less pixels means less data, which means smaller files. Smaller files online are important because they help your webpages load faster.
Notice that the image size at the bottom has been drastically reduced by changing the image size. After making my changes, click “OK” and your edited images are changed. Save your files and your images will be permanently changed to this smaller version.
Tip: If you do this and still find that your images are too large, check out Tiny PNG for an easy, free, online resource for image compression.
Annotations
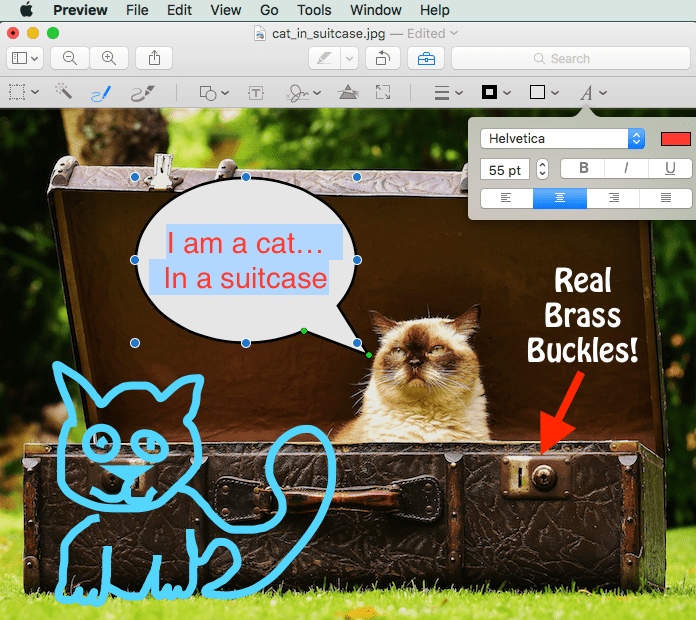
Preview lets you do some pretty cool things like add content to photos and PDF files, but the options for this are not readily on the toolbar without choosing it from the top menu. In this photo I was able to add all of the enhancements you see using Preview.
To access annotations, in the top navigation, click Tools > Annotations >. You’ll see a number of options appear. Choose any of those options, and the entire annotations toolbar will appears. You can make a number of enhancements with text, lines, arrows, and even draw on it freehand.
To access annotations, in the top navigation, click Tools > Annotations >. You’ll see a number of options appear. Choose any of those options, and the entire annotations toolbar will appears. You can make a number of enhancements with text, lines, arrows, and even draw on it freehand.
Color adjustments
Any graphic designer will tell you that Photoshop is the industry standard tool for major photo editing, and most professional photographers will sing the praises of programs like Lightroom for bulk color correction and editing. However, for those who are less Adobe-savvy, or who just want a quick, easy fix, Mac Preview has you covered.
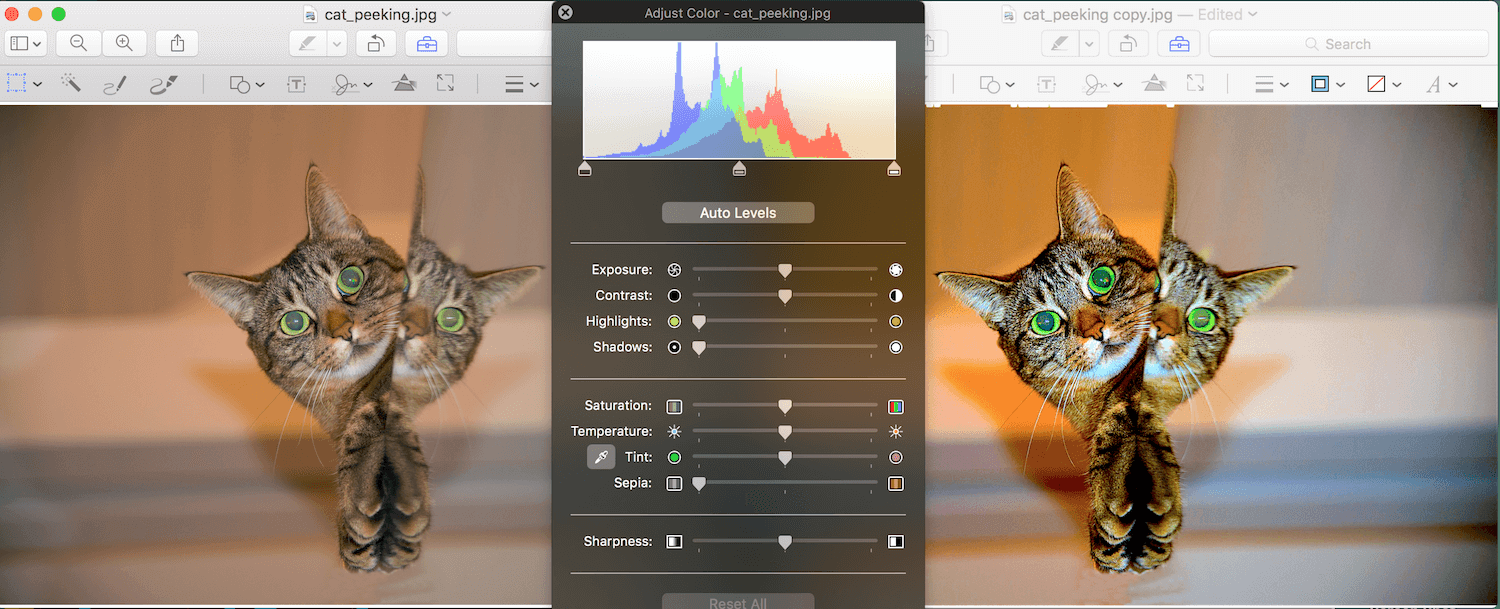
Typically adjusting the exposure is the big item here, but there are a number of adjustments you can make quickly and easily to drastically alter the look and feel of photos. Another adjustment I use often is taking the saturation to zero, which results in a black-and-white photo. Just keep in mind here that a little bit goes a long way, and photos can quickly look unprofessional when these adjustment options are overused.
Crop functions
When you first open a photo in Mac Preview, the cursor is a crosshair that you can drag to make a rectangular shape. drag, make your selection, and choose Tools > Crop to remove everything except your selected area. As a bonus, you can see the dimensions of the selected area, which can help if you know you want a specific-sized photo.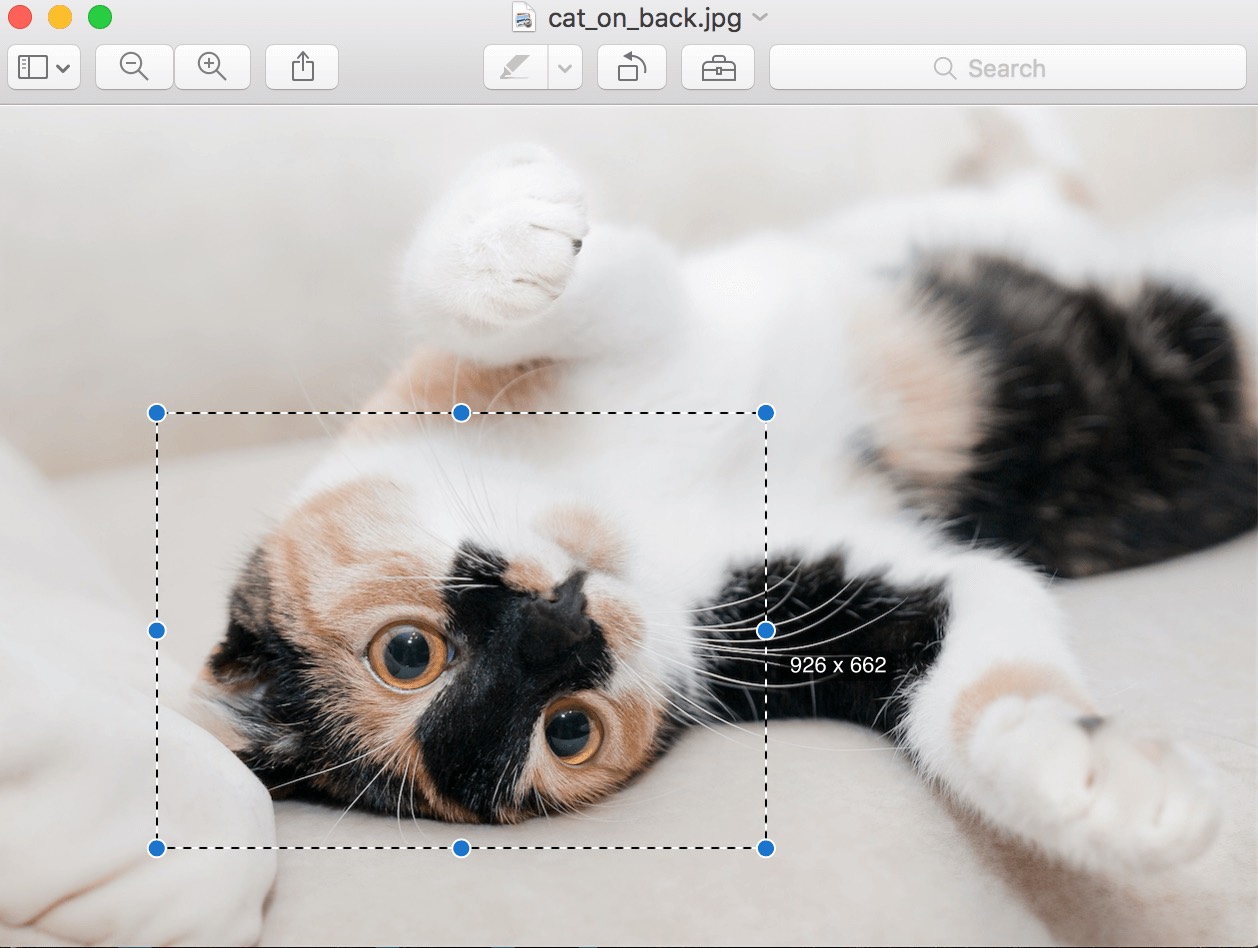
But, you can do more than just crop a photo down. You can make specific selections and copy/paste those selections in the same or in different photos within Mac Preview. Want this cat to have three eyes? Just use the Smart Lasso tool to select one eye, then copy/paste/move it it into place.

Exporting

Choose File > Export and you will see a clear set of options for getting your file in the format you need.
The export function is very helpful for converting in- and out-of-PDFs, and it’s also useful for saving a cropped photo as a PNG to style it with no background (just like our TBH Creative headshots).
If you liked these tips, you might also like:
Do you need more from your website so you can display great images?
Let’s get started
This post was written December 13, 2016.

About the author TBH Creative
TBH Creative is an award-winning marketing company specializing in web design/development, digital strategy, inbound marketing, and reporting. Since 2004, we’ve built multi-dimensional digital marketing campaigns and complex, enterprise-level websites for clients in a wide range of industries.
We believe in communicating clearly, delivering excellence, and beating deadlines. But beyond those ideals, what really drives the heart of our business is your business—helping our clients achieve more with comprehensive digital marketing and web design.
Our Indianapolis web design company is WBE-certified in the state of Indiana and the city of Indianapolis, and we’re also a Hubspot-certified inbound marketing agency.